Supplies Needed:
1 bright sunny day
3 2 liter soda bottles (traditionally shaped)
6 12oz. soda cans (traditionally shaped)
1 bottle of black paint
1 bottle of any lighter paint color
1 pair of scissors
1 roll of alluminum foil
1 roll of scotch tape
1 pair of sharp scissors (use caution when cutting and remember to cut away from your body)
Enough cardboard to be able to have 9 12in. x 12in. tiles
Note: Most of the supplies are things you may already have at home or can recycle from a friend. Places like Home Depot, Lowes, Dollar Store and other markets usually have an abundance of discarded cardboard that they would donate for free.
SAFETY FIRST!!!

Before you begin your experiment, make sure to take safety precautions. Since most soda cans will have a sharp edge in the area where the "pop top" is, take caution when handeling these. Also, be careful when using the scissors to cut out the carboard tiles. Remeber that they are sharp and that you should always CUT AWAY FROM YOUR BODY!!!
Setting Up The Experiment
Step 1:
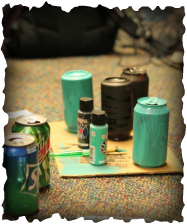
You will begin the preparation phase of the experiment by painting four of the six cans. Two should be painted black and the other two should be painted a color of your choosing. We chose teal. Make sure to paint the bottom and top of the can in addition to painting the sides. This may take more than one coat. You should not be able to see the drink logo. Painting the cans first ensures that they will be completely dry by the time you are ready to fill them with water.
Step 2:
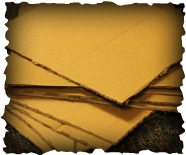
While waiting for the paint to dry, you should begin cutting out the cardboard tiles. The tiles need to be 12 in. x 12 in. Use sharp scissors to cut with and remember to cut away from your body.
Step 3:
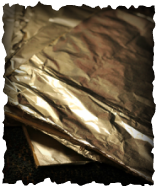
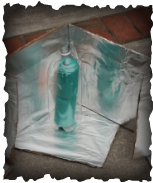
After cutting out the cardboard tiles they will need to be covered with aluminum foil. You can either cover the cardboard by cutting out 12 in. x 12in. pieces of foil and tape it to each cardboard tile or you can simply wrap the tile in aluminum foil. After all tiles have had foil applied to them, take two of the tiles and tape them together on one end to make a 90 degree angle. You will then attach that piece to a third tile to make a stand for the water heater. Be sure to tape the corner piece to the base. (wind may knock it over)
Step 4:
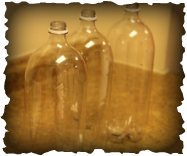
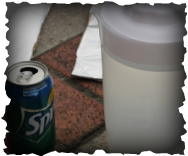
To prepare the plastic 2 liter bottles, you begin by removing all of their contents. You will then peal off any lables on the outside of the bottle. (these may inhibit sun light from reaching the water resulting in false data) The bottles should then be washed thoroughly to remove any sticky residue from it's contents or lable adhesive. Upon completion, the bottles should look like the ones pictured here on the left.
Step 5:
Cutting the 2 liters can be a little tricky, so be sure to use caution. The cut plastic and scissors can cut you. Remember to cut away from your body!
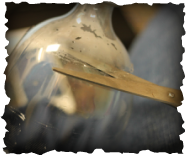
You will begin by cutting an opening around top of the bottle. The hole will need to be large enough for the soda cans to slide in with ease.
You will begin by cutting an opening around top of the bottle. The hole will need to be large enough for the soda cans to slide in with ease.
Step 6:
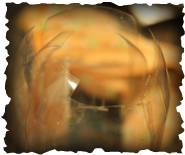
After the access hole is cut for all three 2 liters, you will then make your downward cuts. Starting at the top and going down, you will make 2 cuts. They will be 4 in. in length and 1/2 in. wide. This will make one tab. Each bottle should have a total of 4 tabs spaced approximately 2-3 inches apart. Repeat this same process for all three 2 liters. At this point the painted cans should be dry and you are ready to move on to step 7.
Step 7:
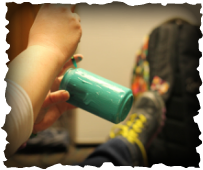
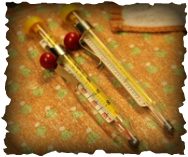
Now that all of the materials are prepared, you are ready to set up the experiment. Start by filling a pitcher with 6 cups of water. Then, using a candy thermometer, take the temperature of the water to ensure that all cans will have the same starting temperature. Then fill each can with 1 cup of water.
Step 8:
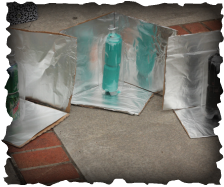
You will then take each filled can and stack them one on top of the other inside one of the 2 liter bottles. Put the matching cans together in the same bottle. Then place the bottle on one of the foil covered stands and turn it to face the sun. All of the stands should be facing the same way. (Be careful not to cut yourself on the plastic tabs)
Step 9:
Allow the water to heat for 10 minutes. You will want to use a timer for accuracy. Then remove the cans from one of the bottles and pour the water back into the pitcher. Record the temperature of the water quickly so that the elements do not change it. Be sure to note the temperature change so that it can be input into a table later.
